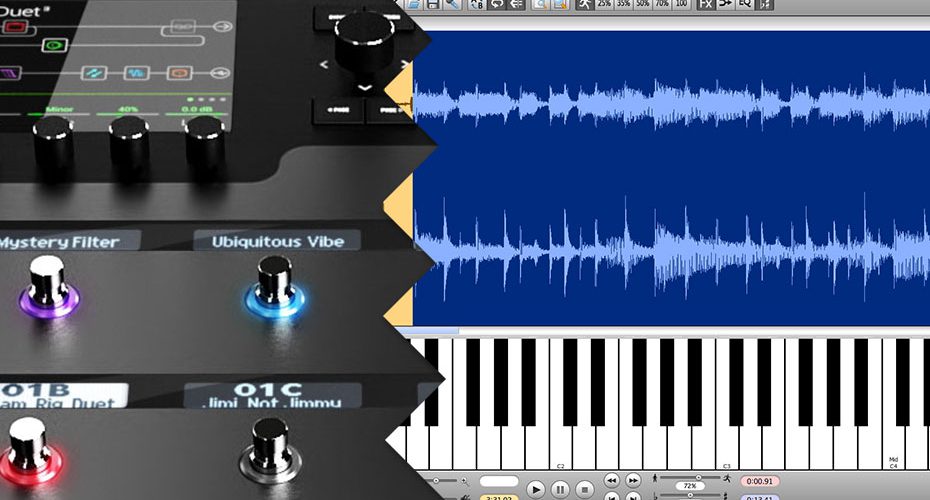

In this article I show you how you can control a software with helix using midi commands.
I use Transcribe as an example but you can control any software that accepts MIDI commands.
Transcribe! is a great software to transcribe music by ear and learning or practicing songs on your instrument. It has some really helpful features like setting markers, looping certain parts of a song, slow down and speed up without changing the pitch and so on.
Download Transcribe!
For more information and to download a free trial copy please go to the Transcribe! Website www.seventhstring.com
Assign Transcribe! Functions to Line 6 Helix
When learning or transcribing a song, the functions that I use most often are the following:
- Play and Stop
- Slow down
- Speed up function
So these are the functions I’ll assing to the footswitches of Line 6 Helix.
Assign Helix as MIDI device in Transcribe!
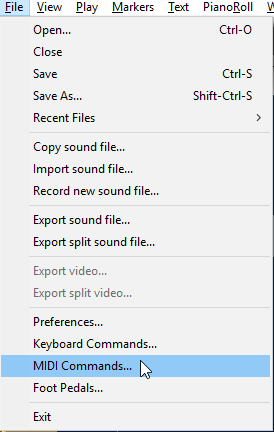
First of all, we have to make sure that Helix is assigned as the midi device in Transcribe!. For this we open the “File” menu and choose the entry “MIDI Commands …”.
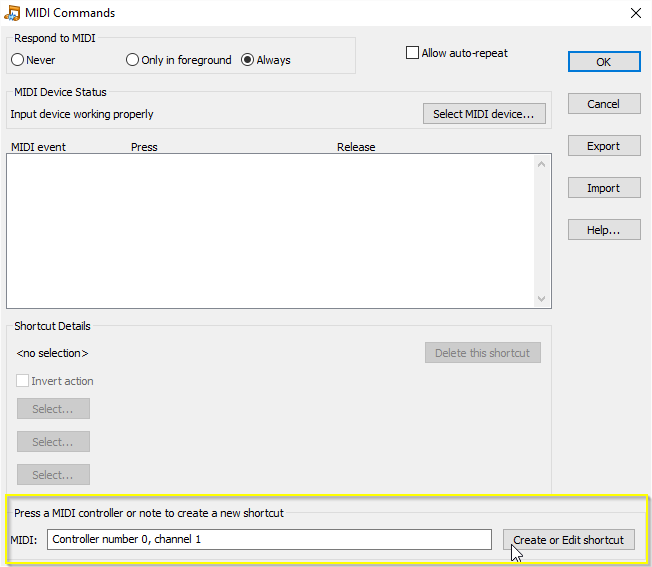
Under the section “Midi device status” hit the button “Select Midi device” and ensure Helix is the selected device. If you see the massage “Input device working properly” you should be ready to go.


Assigning the Play/Stop function to Helix
Now let’s switch to the Helix Editor and assign the Play/Stop function to a footswitch.
- Load the patch on which you like to assign the footswitches.
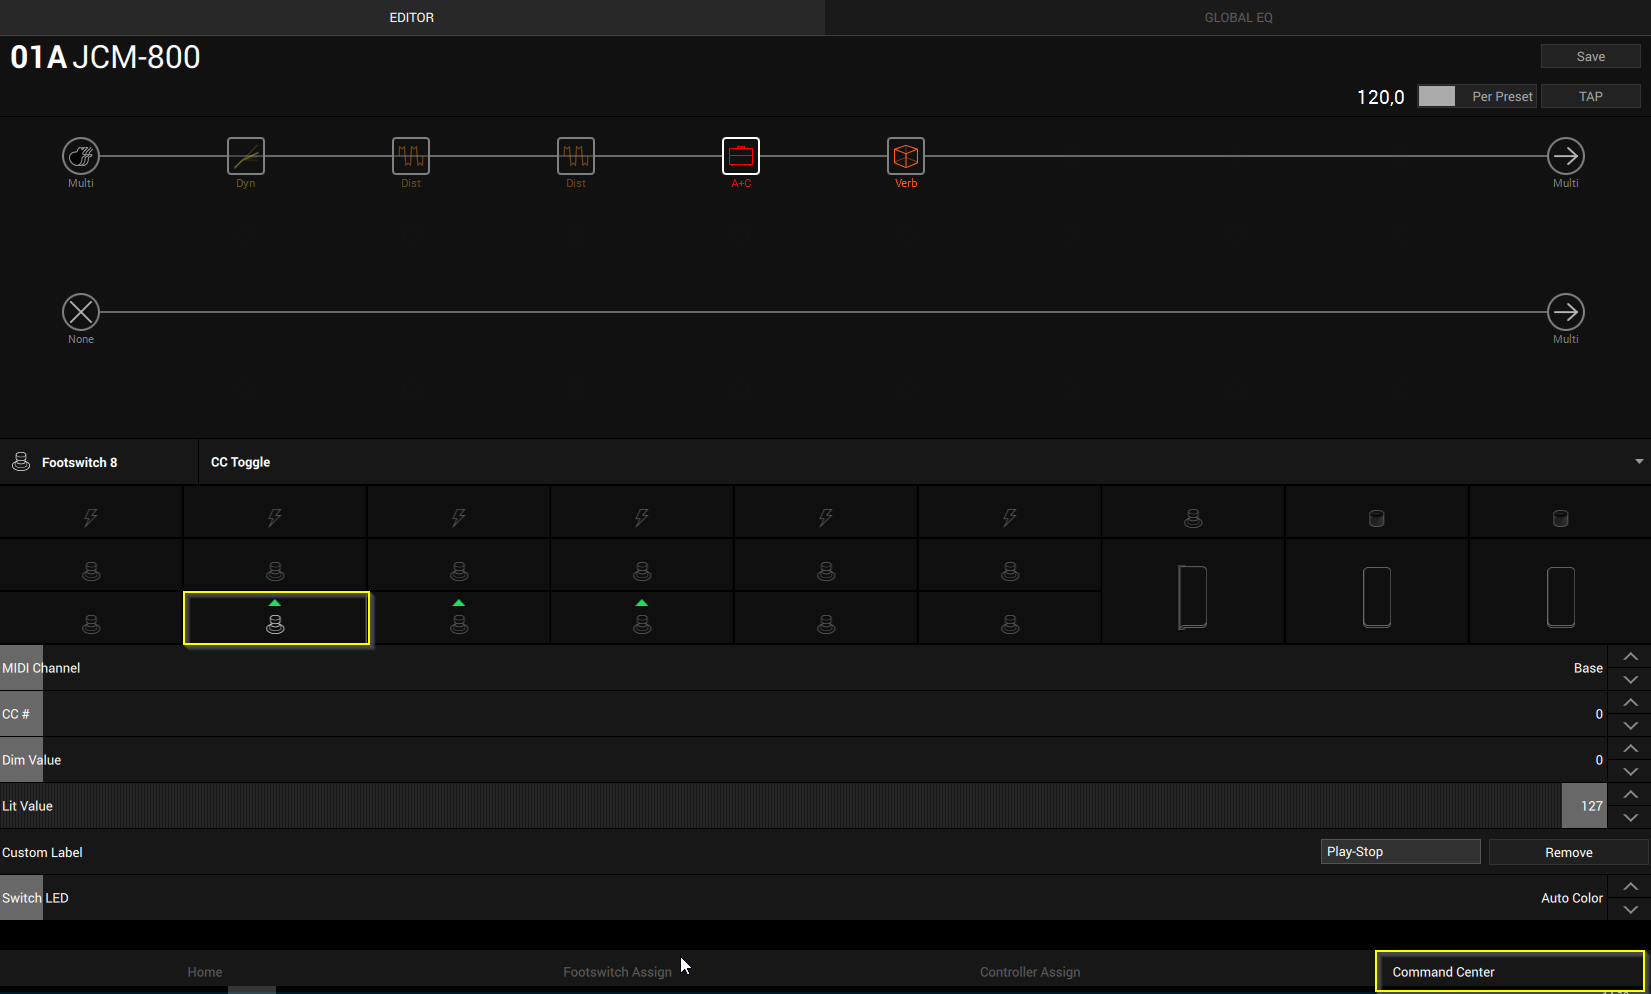
- Then go to the “Command center” on the right bottom corner.
- Click on the footswitch on which you like to have the Play/Stop function
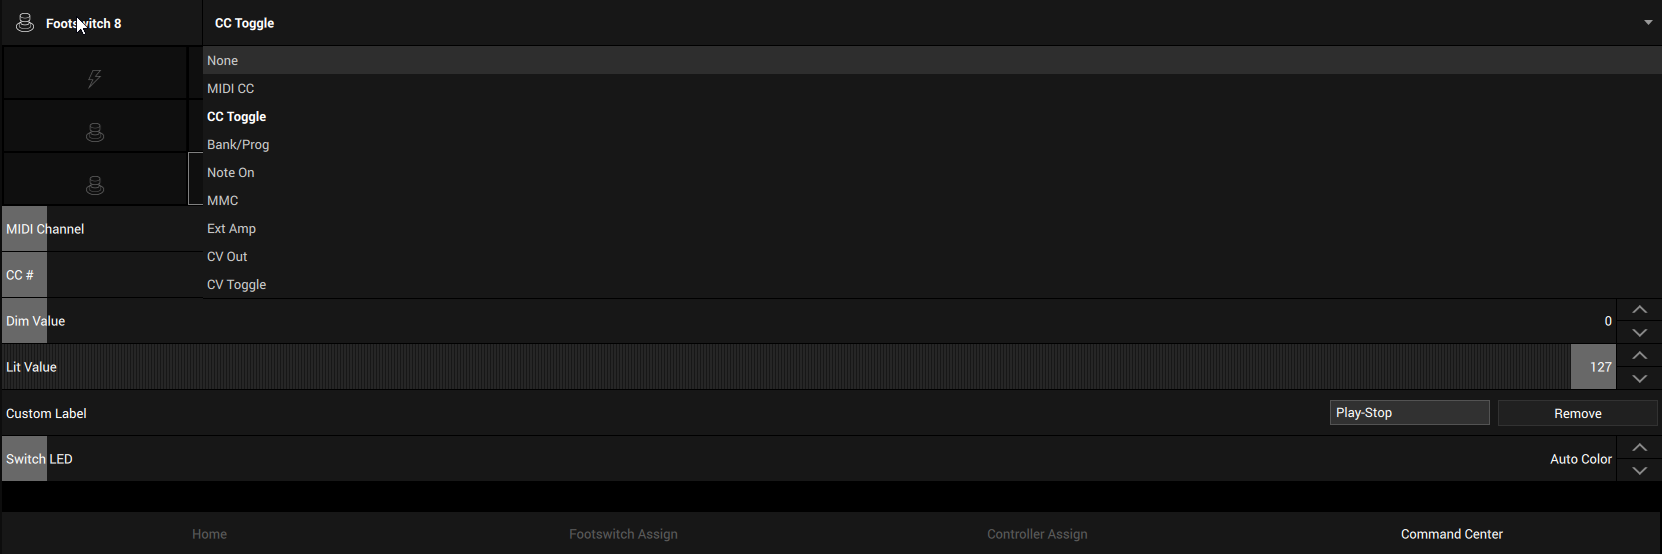
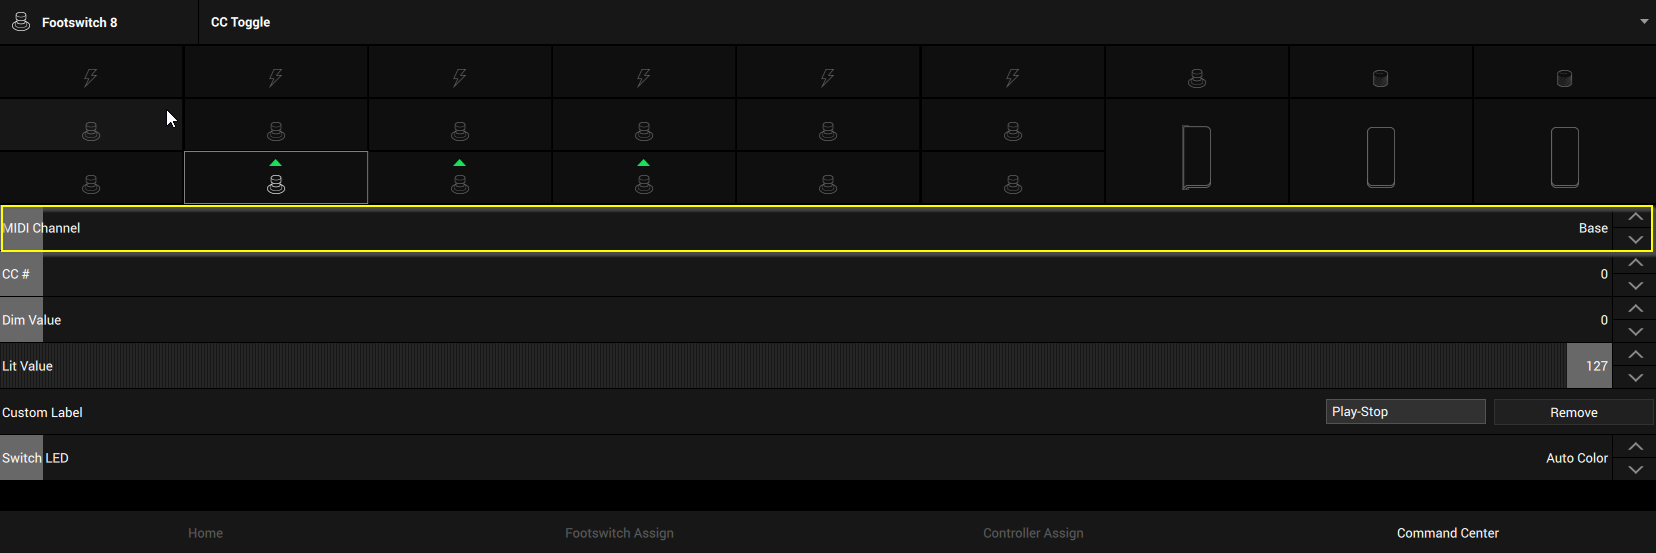
Since we like to function the footswitch as play and stop button, we choose the command CC Toggle.
We can left MIDI channel on the default value which should be “Base”. So Helix uses the value from the global settings. On default this should be channel 1.
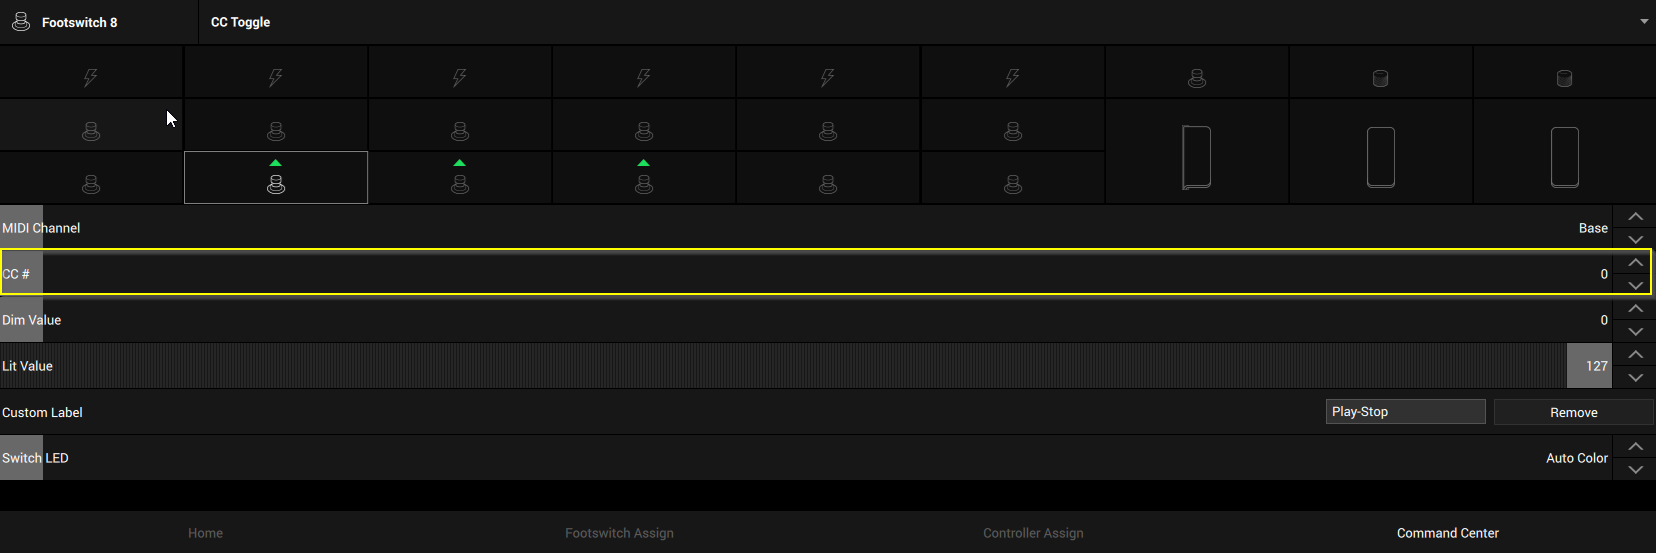
The CC Value we leave at 0 since we use the Dim and Lit value for play and stop function.
The footswitch will be function as ON/OFF button. Typically, the value 0 stands for “OFF” and the value 127 stands for “ON”.
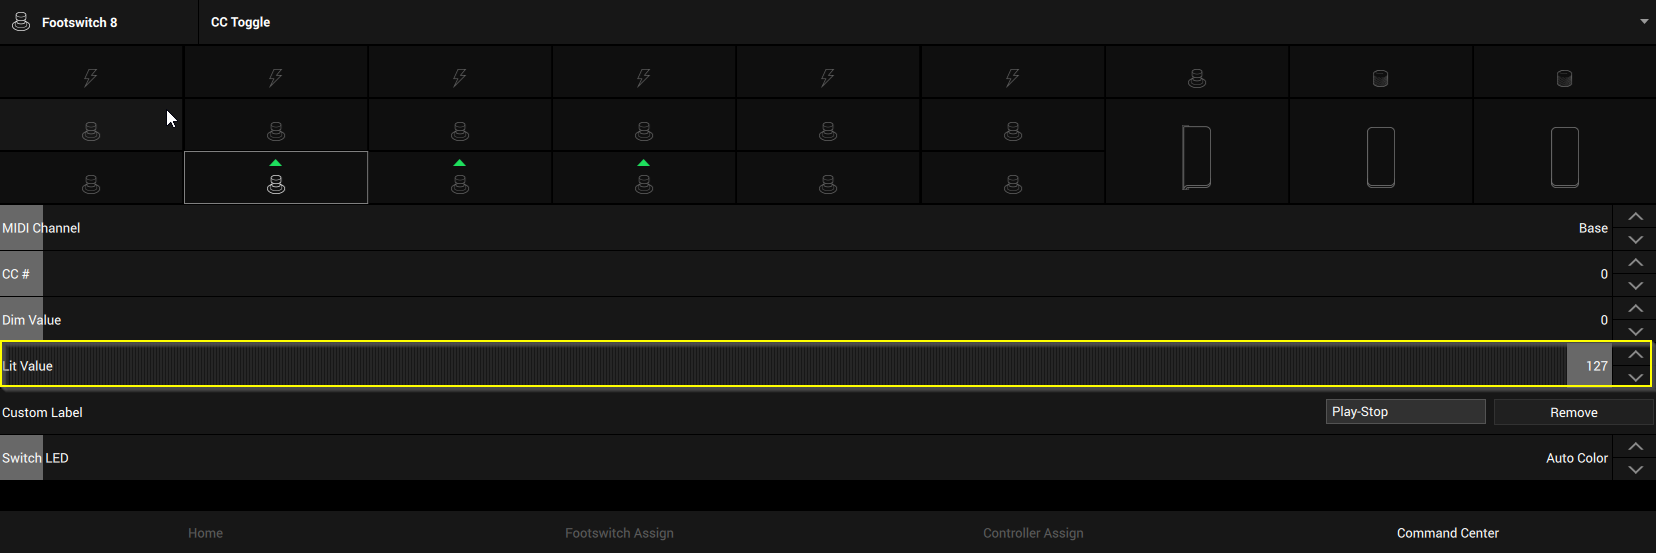
I like the light to be on when playing and off when stopping. So we assign the value 0 as the “Dim Value” and the value 127 as the “Lit Value”.
If you hit the “Customize” button, you can Label the Footswitch to whatever you like. I’ve called it Play-Stop since this is what it does 😉


Assigning the Play/Stop function in Transcribe!
Now it’s time to assign the footswitch in Transcribe!. To do so we open up the “MIDI Commands” dialog again.
- So we go to File -> “Midi Commands”.
- With this dialog opened we hit the footswitch on helix which we just configured as Play-Stop button.
- In the text field under the section “Press a Midi controller or note to create a new shortcut” the value should change.
- Now we hit the button “Create or Edit shortcut”.
- Transcribe assigns the play and stop function by default so we have nothing more to do here and we can close the “MIDI Commands” Dialog to test the button.

Assigning the speedUp function to the Helix footswitch
The next function I like to control with helix is the speedup function namely speeding up 1% every time I hit the footswitch.
- In the Helix Editor we go to the Command Center again
- Touch the footswitch you like to assign for speeding up
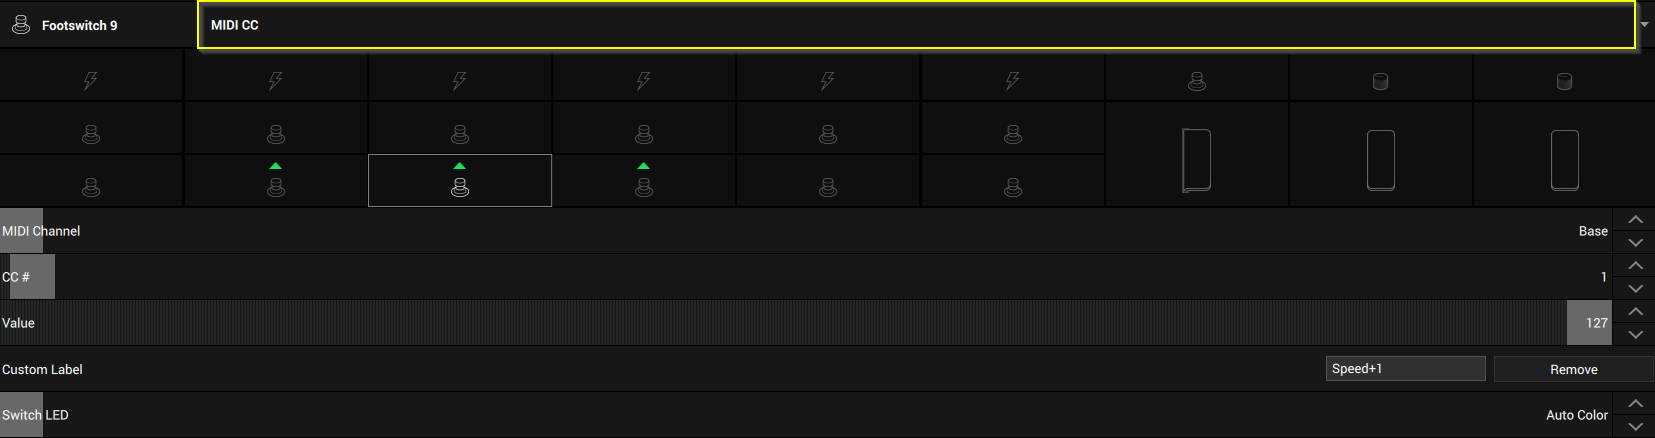
- This time we the switch should control only one function. So we choose “MIDI CC” instead of “CC Toggle”.
- We leave MIDI channel on “Base” as we did before
- Now the CC value has to be changed to a different value as we used before otherwise we won’t able to assign anything in Transcribe.
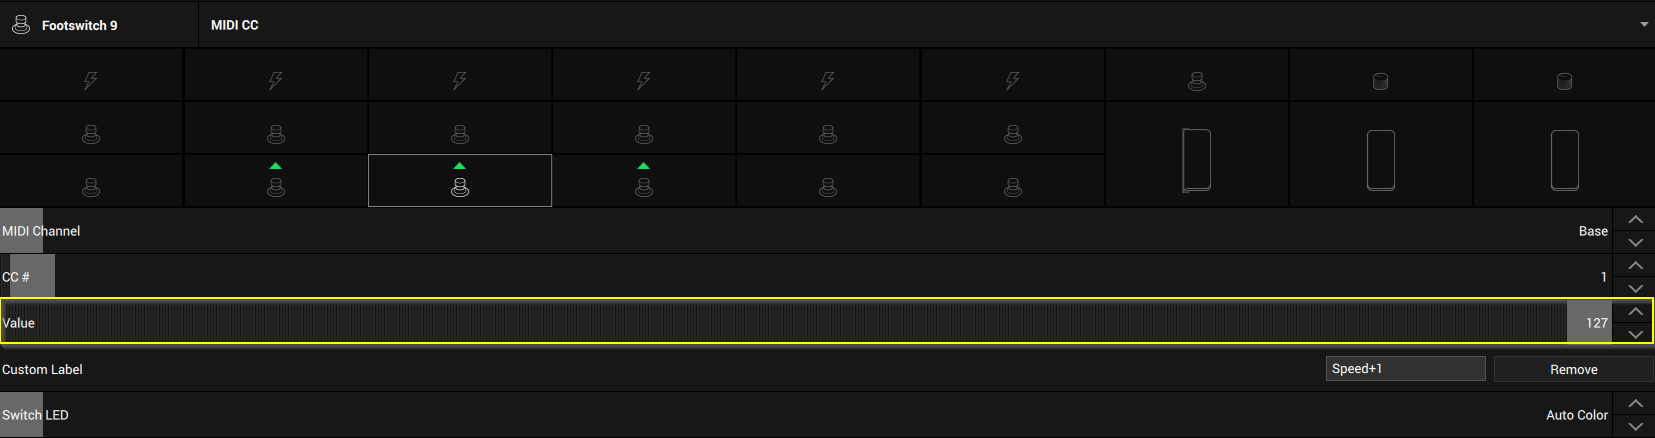
We left the CC on the default value before, which is 0. So this time we change it to 1. - The Value of the MIDI command it isn’t important here. I’ve set it to 127 but any value would work.
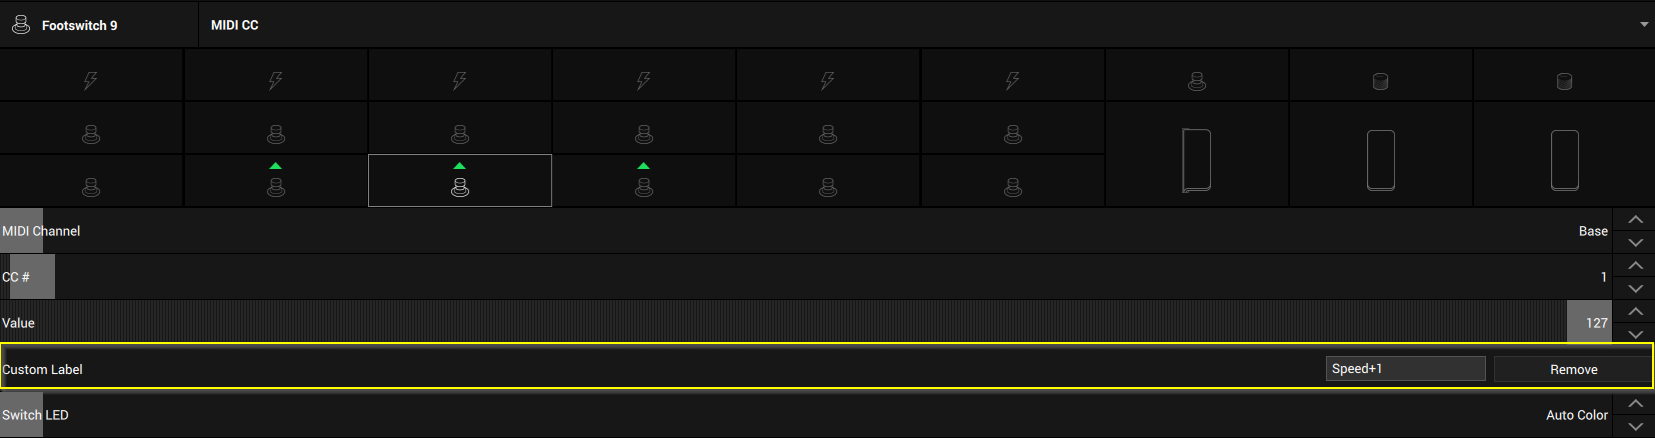
- Assign the label you like in the custom Label section

Assigning the speedUp function in Transcribe!
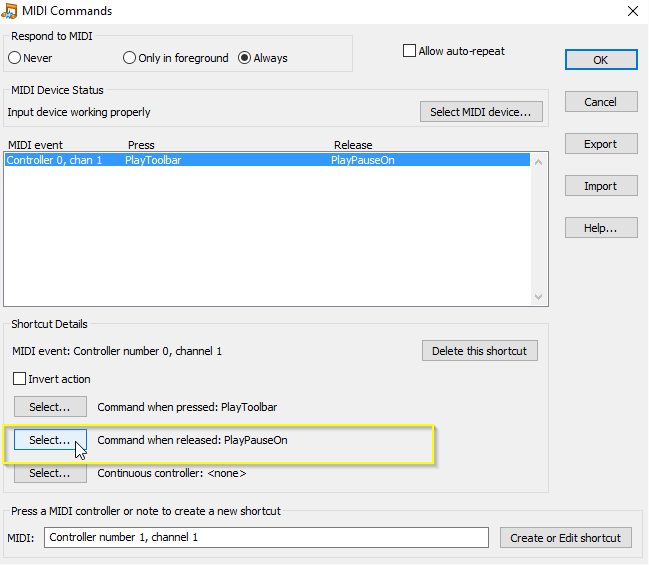
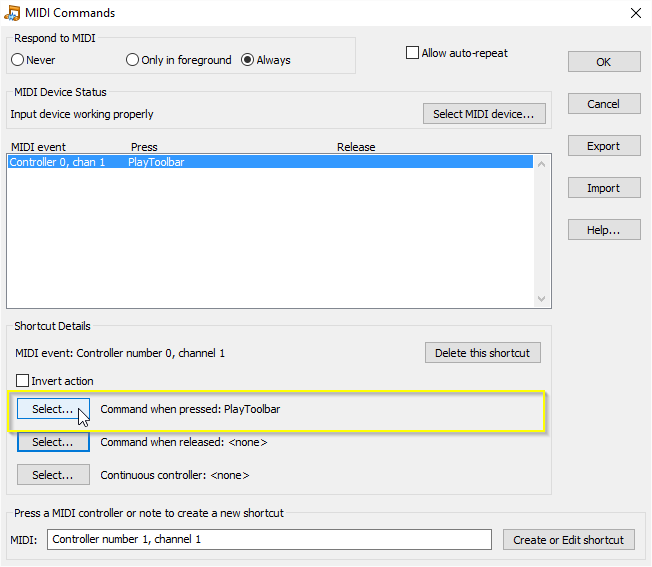
- To assign the footswitch in Transcribe we open the “MIDI Commands” dialog again. Hit the footswitch on helix and create a new shortcut.
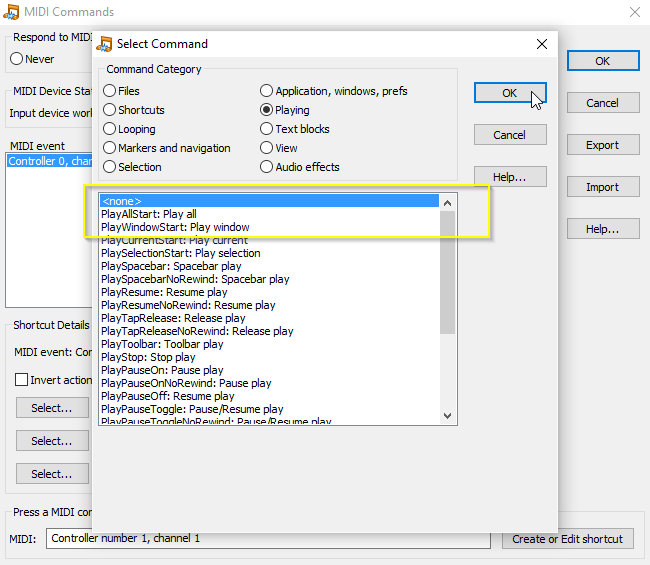
- This time we need only one function so we have to clear the command on release. Hit the “Select” Button, scroll to the very top and choose the entry “none”.
- Then hit the “Close” Button to close the dialog.
- Next we assign the SpeedUp 1% function, when the footswitch is pressed. Hit the “Select” Button next to “Command when pressed”.
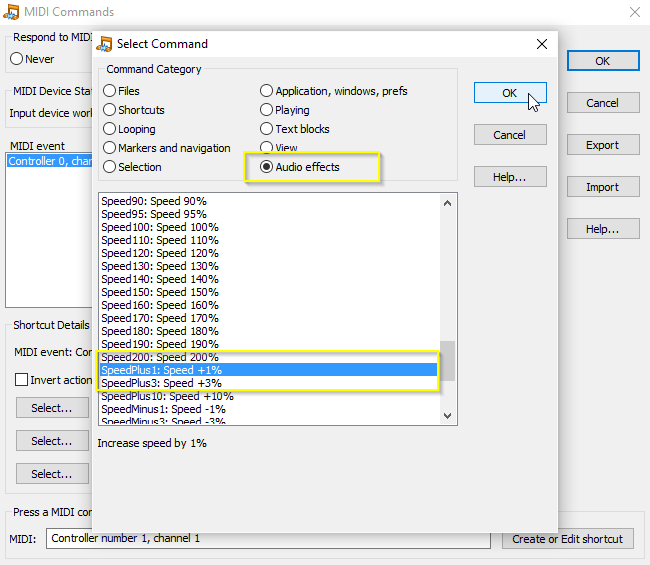
- In the appearing dialog we change the Command Category to “Audio effects”
- Scroll to the entry “SpeedPlus1: Speed + 1%” select it and confirm with OK
- Close the “MIDI Commands” dialog and test it
Assigning the slowDown function to the Helix footswitch
For decreasing the speed, we repeat the exact same procedure as we did with the SpeedUp function. But this time we set the CC value on the Helix to the value 2. In Transcribe instead of choosing “SpeedPlus1” we select “SpeedMinus1: Speed + 1%”.
Video – Helix as MIDI Controller for Transcribe!
Video by dshowmusic.com
Please leave a comment in the comment section below and let me know how you use Helix as a MIDI controller.
If you like this article please subscribe to my Social Media channels:
Get Transcribe!
To download a free trial copy please go to the Transcribe! Website www.seventhstring.com
PLEASE DONATE
If you find this content helpful, please consider a donation. Thank you!